D Using GAIA to Create an RA/DEC Calibration

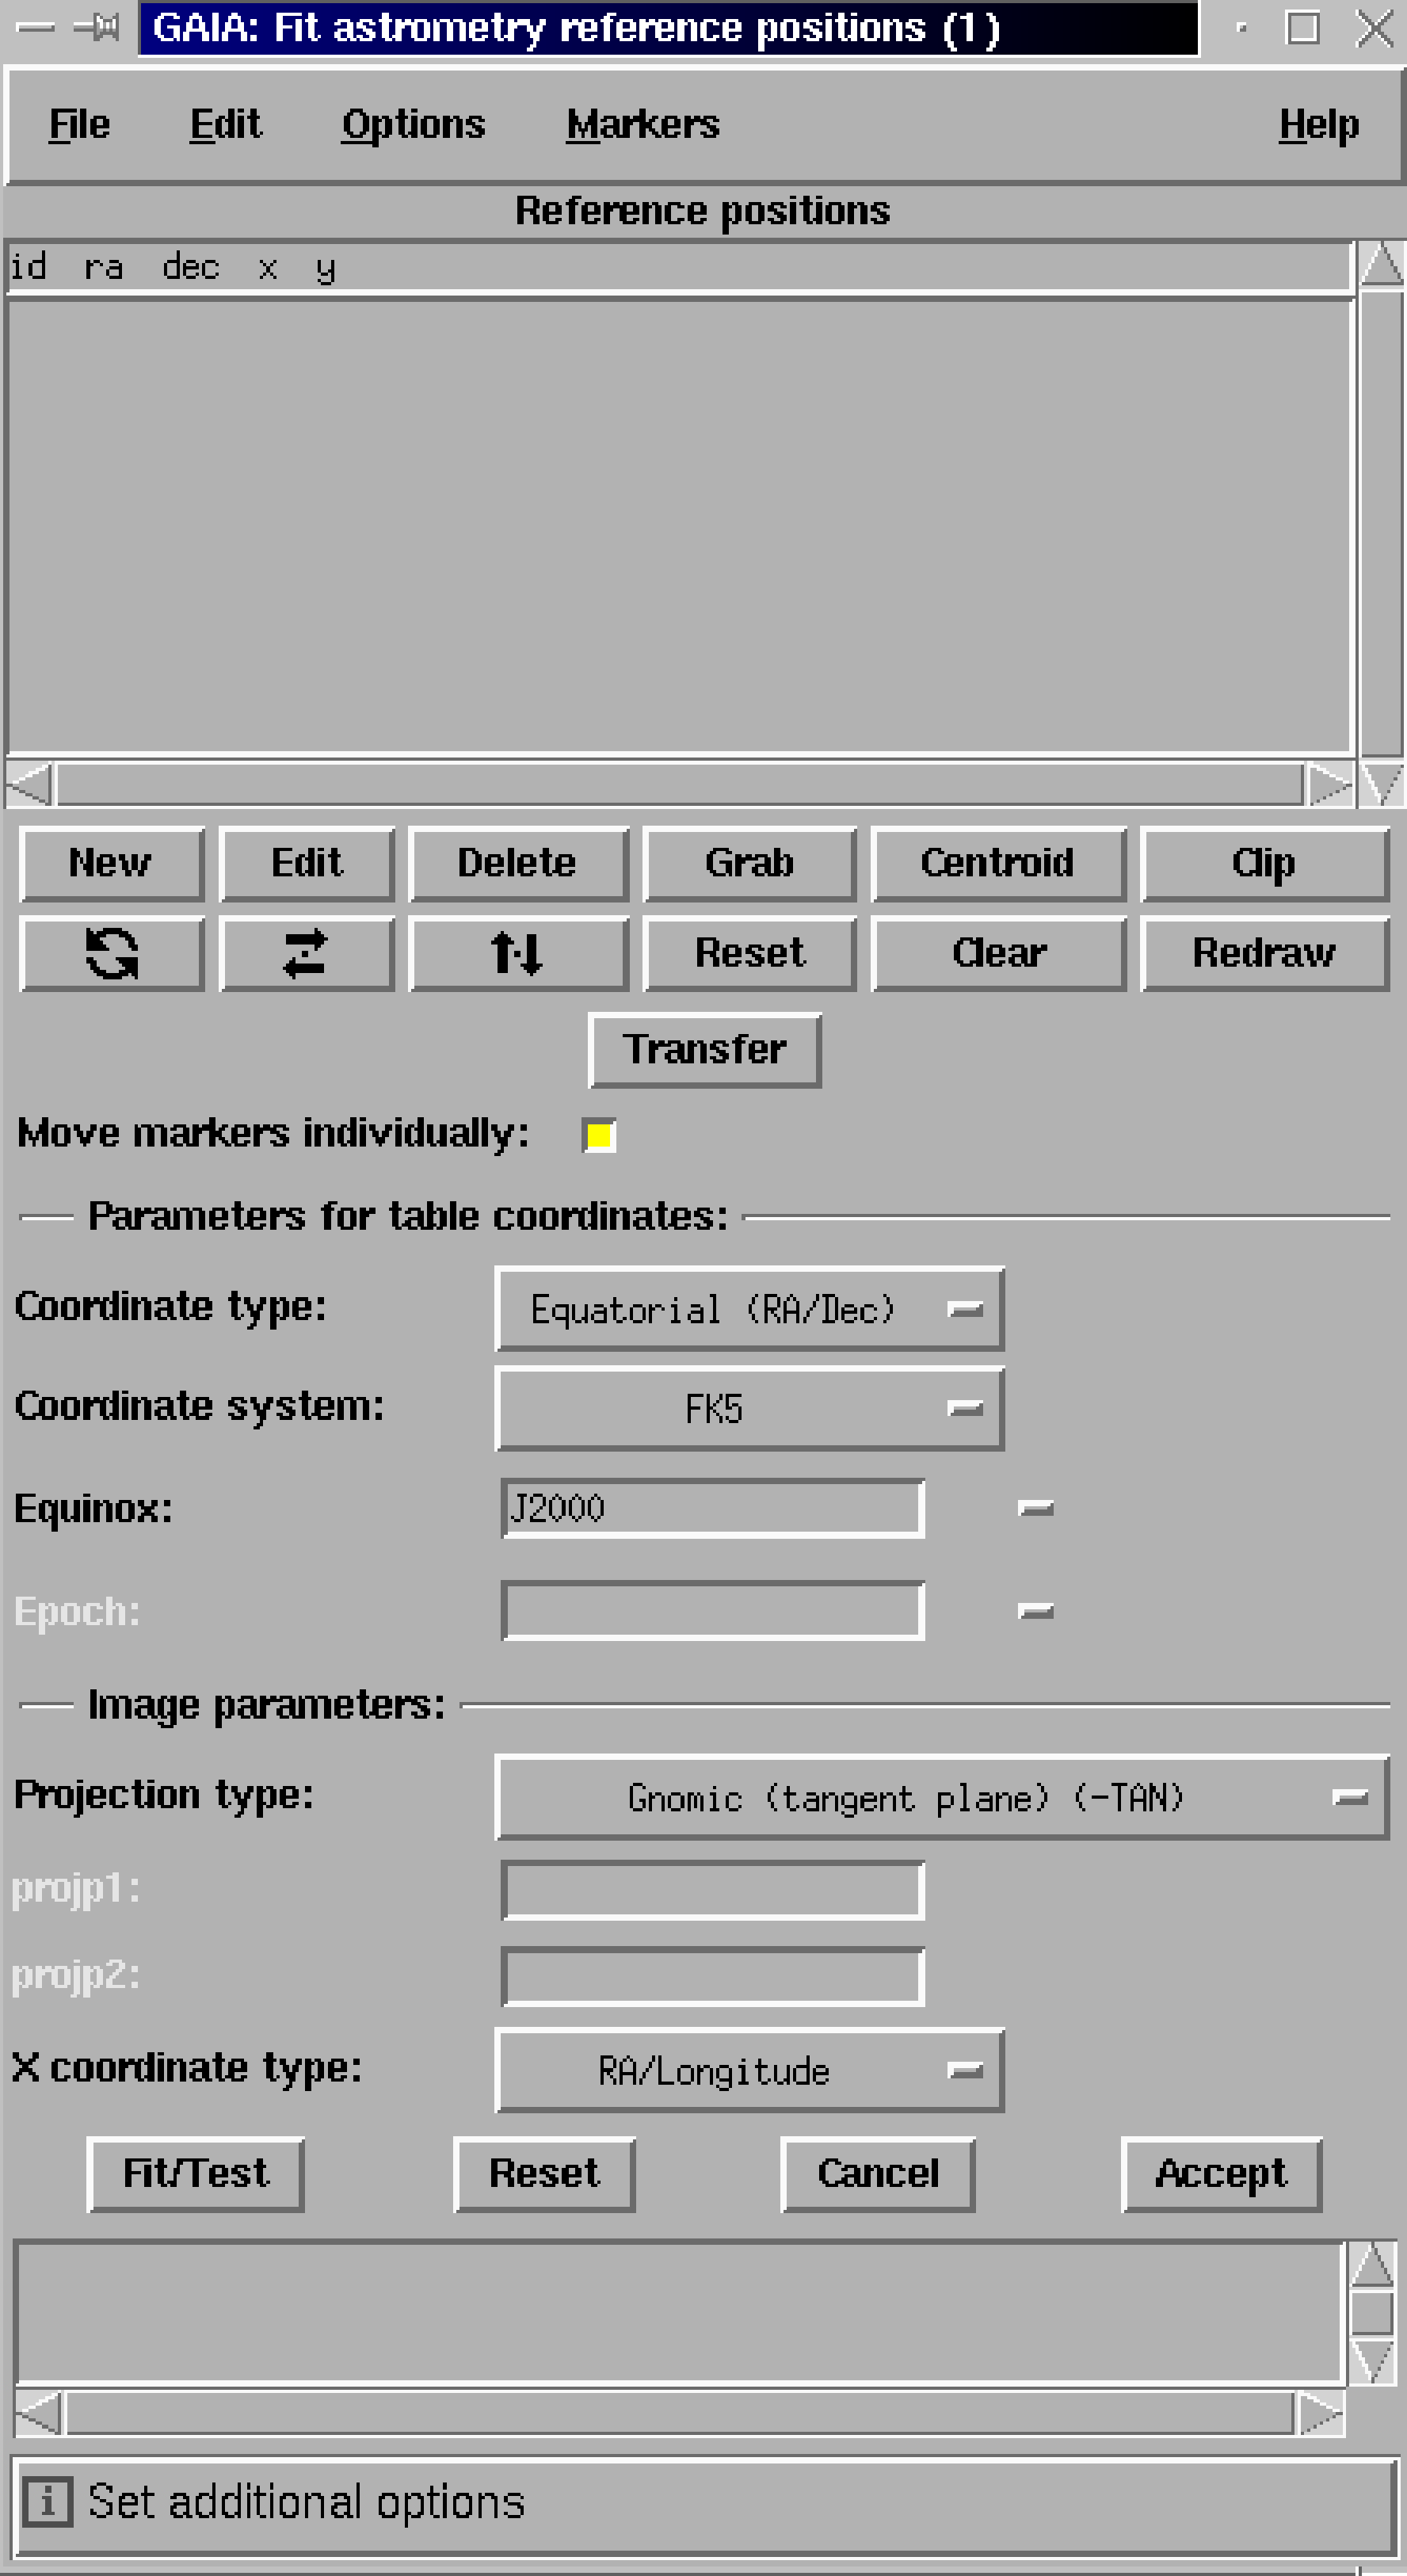
This section gives a very brief and simple outline of how to add an RA/DEC calibration to a 2-dimensional image using GAIA (see SUN/214).

(1)
Start up GAIA, including the name of the NDF containing the image on the command line. For instance,
  % gaia fred

will start up GAIA, displaying the image in file fred.sdf. If you are using non-NDF images, include the file type (e.g.fred.fit”).

(2)
Press the Image-Analysis menu button. Select the Astrometry calibration item from the displayed menu, then select Fits to star positions from the next menu. This should display the dialogue box shown in Figure 8.


pdfpict
Figure 8: The main GAIA dialogue box used to create an RA/DEC calibration.


(3)
Indicate the co-ordinate system in which your feature positions are expressed. Do this by specifying suitable values using the co-ordinate system:, Equinox: and Epoch: buttons. You will usually have either (FK4, equinox B1950) or (FK5, equinox J2000) positions. The epoch defaults to B1950 for FK4 positions, and J2000 for FK5 positions.
(4)
Press the New button, to indicate that you want to add some new positions to the (currently empty) list of reference positions. This should produce the dialogue box shown in Figure 9.


pdfpict
Figure 9: The GAIA dialogue box used to give a new reference position.


(5)
Now press the Pick object... button. This will create the dialogue box shown in Figure 10. The upper black box displays a section of the main image centred on the position of the cursor. Position the cursor in the main GAIA window over a feature (usually a star) for which you know the RA/DEC. This star should appear in the box in the “object picker” dialogue box (Figure 10). If there are any other significant features visible in the box, you should reduce the size of the box using the zoom-out button below the displayed image section. Once you are happy with the sample size, re-position the cursor over the star and press the left mouse button. The pixel co-ordinates at the centre of the feature are displayed in the Image X: and Image Y: fields within the object picker dialogue box


pdfpict
Figure 10: The GAIA object picker dialogue box.


(6)
Raise the dialogue box shown in Figure 9. You should find that the pixel co-ordinates of the star have been copied into the X and Y fields. Click in the ra field, and enter the RA of the star (e.g. "12:23:34.1"). Then do the same with the dec field. Then click in the id field, and enter an integer value which can be used to identify the star (for instance, use 1 for your first star, 2 for your second, etc). The star is now fully specified, so press the Enter button. After confirmation, this will add the object into the list of reference objects in the dialogue box shown in Figure 8.
(7)
All the windows will remain open, so you can continue to enter new reference stars in the same way. First click on the Pick Object button in the dialogue box shown in Figure 10. Then position the cursor over a star in the main window, click with the left button, enter the RA, DEC and ID values for the star, and press Enter.
(8)
Once you have entered all your reference positions, close the dialogue boxes shown in Figures 9 and 10 by pressing the Close button in each one.
(9)
Press the Fit/Test button in the dialogue box shown in Figure 8. This will calculate the best RA/DEC calibration given your reference positions. It then uses this calibration to work out the pixel co-ordinates corresponding to each of your reference positions, and displays markers in the main image at these pixel co-ordinates. You should find that they fall on top of the corresponding stars. If they do not, you have probably entered a bad RA or DEC value. You should correct the reference positions, and then press the Fit/Test button again. To correct the reference positions, position the pointer over the erroneous line in the list of reference positions, and click the left button (the selected line will be highlighted). Then click the Edit button, the dialogue box shown in Figure 9 will re-appear, loaded with the details of the selected feature. Correct the values, and then press Enter, followed by Close. Now you can press Fit/Test again to re-calculate the RA/DEC calibration.
(10)
Once you are happy with the calibration, press the Accept button. You can now save the RA/DEC calibration by pressing the File menu button in the main window, and then the Save as menu item. Use the resulting dialog box to save the image (with the RA/DEC calibration) in a new file. This is most simply done by entering the new file name in the Selection box, and pressing OK. Do not worry if a message is displayed saying that the WCS could only be saved as an AST native representation.